What Is the Standard Passport Photo Size?
The standard passport photo size varies slightly by country, but most nations follow a format close to 35mm × 45mm or 2 inches × 2 inches (51mm × 51mm). Here’s a quick overview:
| Country / Region | Passport Photo Size (mm) | Passport Photo Size (inches) |
|---|---|---|
| United States | 51 × 51 mm | 2 × 2 inches |
| United Kingdom | 35 × 45 mm | 1.38 × 1.77 inches |
| India | 35 × 45 mm | 1.38 × 1.77 inches |
| UAE / Dubai Visa | 35 × 45 mm | 1.38 × 1.77 inches |
| Schengen Visa | 35 × 45 mm | 1.38 × 1.77 inches |
| China Visa | 33 × 48 mm | 1.3 × 1.89 inches |
| Vietnam Visa | 40 × 60 mm | 1.57 × 2.36 inches |
| Nepal | 35 × 45 mm | 1.38 × 1.77 inches |
Passport Photo Size Width and Height — Key Dimensions Explained
Understanding passport photo width and height is crucial before printing or uploading a digital photo. Most rejections happen because applicants use the wrong crop dimensions or incorrect head height ratios.
Key Measurements to Know:
- Head height should occupy 70–80% of the total photo height
- Eyes must appear in the upper 55–70% of the frame
- Background must be plain white or off-white (for most countries)
- Expression must be neutral, with mouth closed
US Passport Photo Size Requirements
The US passport photo size is one of the most searched formats globally.
- Dimensions: 2 × 2 inches (51 × 51 mm)
- Head height: 1 to 1⅜ inches (25 to 35 mm)
- Background: Plain white or off-white
- File format for digital submissions: JPEG (.jpg)
- File size: Under 11 MB
- Resolution: Minimum 600 DPI (dots per inch)
This same size applies to the US visa photo — whether you’re applying for a tourist visa, student visa, or immigrant visa.
Tip: For US passport and visa photos, Walgreens, CVS, and the USPS offer in-store photo printing services that automatically apply the correct crop.
UK Passport Photo Size Requirements
The UK passport photo size follows the ICAO (International Civil Aviation Organization) standard:
- Dimensions: 35 × 45 mm
- Head height: 29–34 mm (64–80% of photo height)
- Background: Light grey or cream (not pure white)
- Expression: Neutral with both eyes clearly open
- Glasses: Not permitted since 2018
India Passport Photo Size Requirements
The passport photo size in India follows government guidelines:
- Dimensions: 35 × 45 mm
- Background: White
- Print quality: High quality, glossy preferred
- Head size: Should cover 70–80% of frame
- 8 copy format: Many Indian applicants need 8 passport-size photos for various documents — these are typically printed on a standard 4R (4 × 6 inch) sheet, which fits 8 photos of 35 × 45 mm each.
Dubai & UAE Visa Photo Size Requirements
For a Dubai visa or general UAE visa, the photo requirements are:
- Dimensions: 35 × 45 mm (same as international standard)
- Background: White
- Head coverage: 70–80% of the frame
- Recency: Photo must be taken within the last 6 months
- Expression: Neutral, front-facing
Schengen Visa Photo Size Requirements
Planning a trip to Europe? Here are the Schengen visa passport photo size specs:
- Dimensions: 35 × 45 mm
- Head height: 32–36 mm
- Background: Plain light, preferably white or light grey
- Photo age: No older than 6 months
- Applies to: All 27 Schengen Area countries including France, Germany, Italy, Spain, Netherlands, etc.
China Visa Photo Size Requirements
The China visa photo size is slightly different from the global standard:
- Dimensions: 33 × 48 mm
- Head height: 28–33 mm
- Background: White
- Expression: Neutral, no smiling
- Glasses: Not allowed
Vietnam Visa Photo Size Requirements
For Vietnamese visa applications, the passport photo size required is:
- Dimensions: 40 × 60 mm (larger than most countries)
- Head height: Must cover at least 70% of total height
- Background: White
- Format: Color photograph only
Nepal Passport Photo Size Requirements
For Nepal passport and visa photos:
- Dimensions: 35 × 45 mm
- Background: White or plain light background
- Head height: 70–80% of frame
- Expression: Neutral, front-facing, eyes open
Passport Photo Size Resolution — What You Need to Know
Passport photo size resolution is critical when submitting photos digitally (online visa applications, e-passport systems, etc.).
| Parameter | Requirement |
|---|---|
| Minimum resolution | 300 DPI |
| Recommended resolution | 600 DPI |
| Image format | JPEG (.jpg) |
| Color mode | sRGB |
| File size | Typically under 240 KB–11 MB (varies by country) |
A low-resolution photo may appear clear on screen but will print blurry. Always scan or capture at minimum 300 DPI for printed photos and ensure your digital file meets the destination country’s upload specifications.
How to Convert a Normal Photo to Passport Size
You can convert a normal photo to passport size using free and paid tools:
- Online tools — Sites like PhotoAiD, Passport Photo Online, and Pixelied offer automatic cropping and background removal
- Mobile apps — Many apps auto-crop and adjust your selfie to the correct passport dimensions
- Photoshop / GIMP — Manual editing gives the most control; set your canvas to the exact dimensions in mm or inches at 300–600 DPI
- Walgreens / CVS — In-store kiosks handle cropping, sizing, and printing automatically
Steps to manually resize:
- Open the image in your editor
- Set the canvas size to 35 × 45 mm (or 2 × 2 inches for US)
- Adjust the crop so the head fills 70–80% of the frame
- Set resolution to at least 300 DPI
- Export as JPEG (sRGB color profile)
Printing 8 Passport Size Photos on One Sheet
A common requirement in India and South Asia is printing 8 passport size photos on a single sheet. Here’s how it works:
- Sheet size used: 4R photo paper (4 × 6 inches / 102 × 152 mm)
- Each photo size: 35 × 45 mm
- Layout: 4 columns × 2 rows = 8 photos per sheet
- Software: MS Word, Photoshop, or dedicated passport photo software can tile the images automatically
Most photo studios and print shops in India are familiar with this layout and can produce an 8-copy sheet for a nominal fee.
Passport Photo Size for JPG Format — Digital Submission Tips
When submitting a passport size photo in JPG format online:
- Use JPEG compression quality 80–100% to avoid artifacts
- Keep file size within the portal’s specified limit (commonly 50 KB–2 MB)
- Ensure sRGB color profile (not CMYK)
- Photo dimensions in pixels should translate to the correct physical size at your chosen DPI (e.g., 413 × 531 pixels = 35 × 45 mm at 300 DPI)
Common Passport Photo Rejection Reasons
Even when you know the correct passport photo size requirements, photos get rejected for avoidable reasons:
- ❌ Shadows on the face or background
- ❌ Wearing glasses (now banned in most countries)
- ❌ Head covering (except for religious reasons with documentation)
- ❌ Photo older than 6 months
- ❌ Smiling or open mouth
- ❌ Blurry, pixelated, or digitally altered image
- ❌ Wrong background color
- ❌ Head height outside acceptable range
Quick Reference: Passport Photo Size by Country
| Country / Visa | Width × Height | Notes |
|---|---|---|
| United States | 51 × 51 mm | Square format, white background |
| United Kingdom | 35 × 45 mm | Light grey/cream background |
| India | 35 × 45 mm | White background, matte or glossy |
| UAE / Dubai Visa | 35 × 45 mm | Taken within last 6 months |
| Schengen Visa | 35 × 45 mm | Applies to all 27 EU member states |
| China Visa | 33 × 48 mm | No glasses, no smiling |
| Vietnam Visa | 40 × 60 mm | Larger format than most countries |
| Nepal | 35 × 45 mm | Standard ICAO format |
Frequently Asked Questions
Q: What is the standard passport photo size in mm? The most common international standard is 35 × 45 mm, used by the UK, India, UAE, Schengen, and many other countries. The US uses a square 51 × 51 mm format.
Q: What is the passport photo size for a US visa? US visa and US passport photos are the same size: 2 × 2 inches (51 × 51 mm), with the head between 1 and 1⅜ inches tall.
Q: What resolution should a passport photo be? A minimum of 300 DPI for printed photos. For digital submissions, aim for 600 DPI or follow the specific portal’s pixel dimension requirements.
Q: Can I take my own passport photo at home? Yes. Use a smartphone with a good camera, a plain white wall as background, and natural or even indoor lighting. Then use an online tool or app to crop it to the correct dimensions.
Q: How many passport-size photos are needed for an Indian passport application? Typically 2 photos are required for the passport application form, but many other documents (visa applications, ID cards, etc.) request additional copies — which is why 8-copy prints are popular in India.
Final Thoughts
Getting your passport photo size right is the first step toward a smooth application process. Whether you’re applying for a US passport, a Schengen visa, or a Dubai visa, always double-check the official photo requirements of the issuing authority before submitting.
When in doubt, use a trusted in-store service (like Walgreens for US applicants) or a reliable online passport photo tool that automatically handles sizing, cropping, and background replacement to meet country-specific guidelines.
Last updated: 2026 | Always verify photo requirements on the official government or embassy website before your application.
Convert a Photo to Any KB Size (Quick & Easy Guide)
Whether you need to shrink a passport photo, resize an image for an online form, or convert a photo to a specific KB — this guide explains exactly how a KB converter works and how to use one the right way.
What is a KB converter?
A KB converter is an online tool that changes the file size of a photo — measured in kilobytes (KB) — to a specific number you choose. You upload your image, enter the target size in KB, and the tool compresses or adjusts the photo to hit that number.
Think of it like squeezing a suitcase. The clothes (the photo) stay the same, but the suitcase (the file) gets smaller so it fits where it needs to go.
People most often need a photo KB converter when uploading documents to government portals, job applications, college forms, or any website that sets a maximum file size in KB.
Why does KB size matter?
Most of us think about photos in terms of what they look like — not how many kilobytes they take up. But many websites and forms care a lot about file size.
Here are the most common situations where you’ll need to resize an image in KB:
| Situation | Typical KB Limit |
| Passport / visa photo upload | 20 KB – 200 KB |
| Job application profile photo | 50 KB – 300 KB |
| Government / Aadhaar / PAN portal | 10 KB – 50 KB |
| College or university form | 20 KB – 100 KB |
| Email attachment | Under 1,000 KB (1 MB) |
A photo taken on a modern smartphone can easily be 3,000 KB to 6,000 KB (3–6 MB). That’s 30 to 60 times larger than what many forms allow. That’s where a KB reducer or photo KB converter becomes essential.
How to convert a photo to KB — step by step
Using an online photo KB converter takes less than a minute. Here’s how the process works on most tools:
Step 1: Open a KB converter tool
Go to an image KB converter website. Most work directly in your browser — no app or account needed.
Step 2: Upload your photo
Click Upload and choose your image. JPG and PNG are supported on most photo KB converters. You can usually drag and drop too.
Step 3: Enter the target KB size
Type in the KB size you need — for example, 50 KB or 100 KB. This is the key step that separates a KB converter from a basic image resizer.
Step 4: Convert and download
Click Convert or Compress. The tool processes your photo and lets you download the new KB-converted image.
Step 5: Check the result
Before uploading to your form, right-click the downloaded image → Properties (or Get Info on Mac) and confirm the KB size is within the limit.
💡 Tip: If the converted photo looks blurry, try cropping the photo first to focus on the subject, then re-convert — you’ll get a sharper result at the same KB size.
How to convert KB to KB (changing one KB size to another)
Sometimes your photo is already compressed — but it’s still too large. For example, you have a 300 KB image and the form only allows 50 KB. This is what people mean when they search for a KB to KB converter.
The process is the same as above: upload the existing image and enter the lower KB value as your target. The tool will compress it further to hit the new size.
“Converting KB to KB is just compression applied twice — the tool doesn’t care where you started, only where you want to end up.”
What if you need to increase KB size?
Some portals require a minimum file size. If your image is too small, you may need to increase image size in KB. Most KB converters can slightly increase size by reducing compression — but you can’t add real image data that wasn’t there. Always start with a quality original.
How to convert MB to KB (photo MB to KB converter)
If your photo is measured in megabytes (MB), know that 1 MB = 1,000 KB. A photo MB to KB converter handles this automatically — you don’t need to do the math. Just upload and enter your target KB value.
| Your photo is | That equals | To reach 50 KB |
| 0.5 MB | 500 KB | 10× compression |
| 1 MB | 1,000 KB | 20× compression |
| 3 MB | 3,000 KB | 60× compression |
| 5 MB | 5,000 KB | 100× compression |
The higher the compression ratio, the more visible the quality drop. Converting 5 MB to 20 KB will show some softness — this is normal and unavoidable with standard image compression.
Tips to get the best result from a KB converter
1. Crop before you convert
Removing unnecessary background from your photo reduces data the converter needs to handle. A tightly cropped photo compresses more cleanly than a wide-angle shot.
2. Use JPG for photos, PNG for graphics
JPG compresses photographic images far more efficiently than PNG. If you’re converting a portrait or product photo, always use JPG in your image KB converter. Use PNG only for logos or images with transparent backgrounds.
3. Don’t compress more than once
Every time you compress a JPG and re-save it, you lose quality. Running a photo through a photo KB reducer multiple times degrades it faster. Get it right in one pass.
4. Start with a high-quality original
If you have access to the uncompressed original photo, always start there. Converting a pre-compressed image introduces generation loss — each step downgrades quality further.
5. Check pixel dimensions too
Some forms specify both KB size AND pixel dimensions (e.g., 200×200 pixels, max 50 KB). A good image resize in KB tool lets you set both. If not, resize pixel dimensions first, then use the KB converter for file size.
Frequently asked questions
What is the difference between KB and MB in photos?
KB stands for kilobyte and MB stands for megabyte. One MB equals 1,000 KB. A typical smartphone photo is 3–5 MB (3,000–5,000 KB). Most online forms that set file size limits use KB — which is why a photo MB to KB converter is so commonly needed.
Can I convert a photo to an exact KB size — like exactly 50 KB?
Most KB converters aim to get as close as possible to your target. Due to how image compression works, you might land at 48 KB or 52 KB instead of exactly 50 KB. Always check whether the form says maximum (anything under is fine) or exactly (rare, but some systems require it).
Will converting a photo to a lower KB size make it blurry?
It depends on how much compression is applied. Small reductions (e.g., 500 KB to 200 KB) are usually invisible. Large reductions (e.g., 3 MB to 30 KB) will visibly reduce sharpness. Cropping first and starting with a high-resolution original helps minimize quality loss.
Is it safe to upload my photos to an online KB converter?
Reputable tools process images in your browser or delete them from their servers shortly after conversion. Look for tools that mention client-side processing or automatic file deletion. Avoid uploading sensitive ID documents to unverified sites.
What is the best format for a KB-converted photo?
JPEG (JPG) is best for most photo KB conversions. It offers the highest compression with the least visible quality loss for real-world photographs. Use PNG only if the form specifically requires it or your image has a transparent background.
How do I convert a photo to KB on my phone?
Most online KB converter tools work on mobile browsers — just open the site, tap Upload, select your photo from your gallery, and download the converted version. No app installation is needed in most cases.
Converting a photo to a specific KB size sounds technical, but once you understand what a KB is and why it matters, the process is straightforward. A good KB converter does the heavy lifting — you just need to know your target size, upload your photo, and download the result.
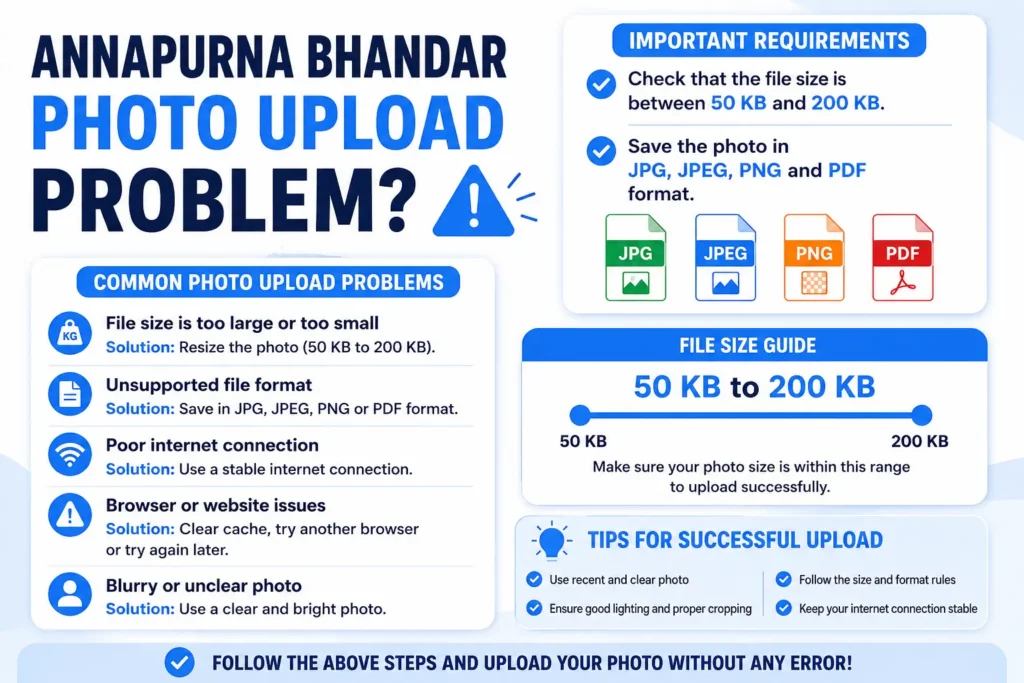
Are you facing an Annapurna Bhandar photo upload problem while submitting your application? Don’t worry. Many users experience errors when uploading their photos to the portal. In most cases, the issue is caused by an incorrect file size, unsupported format, or poor internet connection.
This guide explains the common reasons behind the problem and how you can fix it easily.
Common Annapurna Bhandar Photo Upload Problems
If your photo is not uploading, one of the following issues may be responsible.
1. Incorrect Photo Size
The Annapurna Bhandar portal accepts photos that are between 50 KB and 200 KB. If your image is larger or smaller than this limit, the upload may fail.
Solution: Resize or compress your photo so that its size falls within the required range.
2. Unsupported File Format
The website usually accepts only JPG, JPEG, PNG and PDF
Solution: Convert your image to JPG, JPEG, PNG and PDF before uploading.
How to Fix the Annapurna Bhandar Photo Upload Problem
Follow these steps before uploading your image:
- Use online photo resizer tool
- Upload your Image
- Check that the file size is between 50 KB and 200 KB.
- Save the photo in JPG, JPEG, PNG and PDF format.
Frequently Asked Questions
Why is my Annapurna Bhandar photo not uploading?
The most common reasons are an incorrect file size, unsupported format, browser issues, or temporary server problems.
What is the required photo size for Annapurna Bhandar?
Your photo should be between 50 KB and 200 KB.
Which photo format should I use?
You should upload the image in JPG, JPEG, PNG and PDF format.
Conclusion
The Annapurna Bhandar photo upload problem can usually be fixed by checking the image size and format. Make sure your photo is between 50 KB and 200 KB, use a supported file type, and verify your internet connection. Following these simple steps will help you complete your application without any errors.
If you are planning to apply for the Yuva Shakti scheme, knowing the correct document upload requirements before the portal goes live will save you time and prevent errors during registration. This guide covers every required document, its accepted format, file size limit, and other key details — so you are fully prepared when applications open.
Is the Yuva Shakti Portal Open Yet?
The Yuva Shakti scheme application portal has not yet started. This page will be updated as soon as the registration process begins. Bookmark this page and check back for the latest updates on the Yuva Shakti application start date.
What Is the Yuva Shakti Scheme?
Yuva Shakti is a West Bengal government scheme that provides a monthly stipend of ₹3,000 to eligible youth. Like Yuba Sathi, applicants must register online and upload a set of documents to complete their application successfully.
Yuva Shakti Document Upload Requirements – Complete List
Prepare all documents listed below before the portal opens. Having the correct format and file size ready in advance will help you avoid upload errors and complete your application in one sitting.
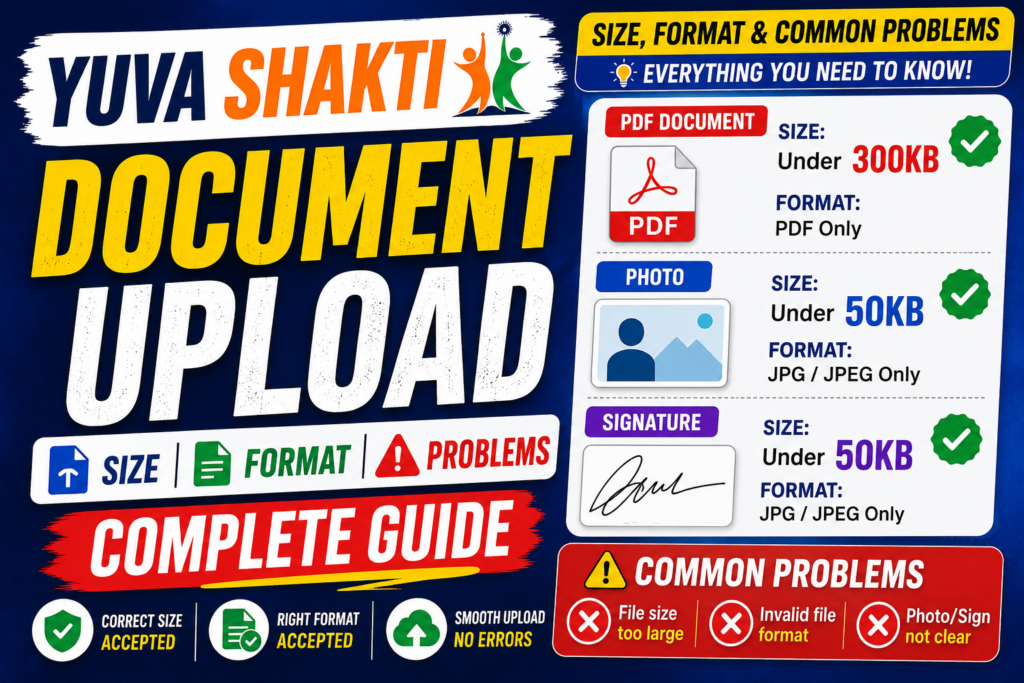
Documents Required (PDF Format – Max 300 KB Each)
All the following documents must be self-attested, saved as PDF only, and each file must be 300 KB or smaller.
| # | Document | Format | Max Size |
|---|---|---|---|
| 1 | Madhyamik or equivalent Admit Card (Self Attested) | PDF only | 300 KB |
| 2 | Madhyamik or equivalent Mark Sheet / Certificate (Self Attested) | PDF only | 300 KB |
| 3 | Copy of Aadhaar Card (Self Attested) | PDF only | 300 KB |
| 4 | Copy of Voter Card (Self Attested) | PDF only | 300 KB |
| 5 | First page of Bank Passbook (Self Attested) | PDF only | 300 KB |
| 6 | SC / ST / OBC Certificate (if applicable, Self Attested) | PDF only | 300 KB |
Photo and Signature (JPG or PNG – Max 50 KB Each)
| # | Document | Format | Max Size |
|---|---|---|---|
| 7 | Recent Passport Size Photograph | JPG or PNG only | 50 KB |
| 8 | Applicant’s Signature | JPG or PNG only | 50 KB |
Mobile Number Requirement
A valid mobile number is mandatory for Yuva Shakti registration. An OTP or Secret PIN will be sent to this number during the application process. This mobile number will also be used for all future communication related to your application. Make sure the number is active and accessible before you begin.
Common Yuva Shakti Document Upload Problems (and How to Fix Them)
1. PDF File Size Exceeds 300 KB
Each PDF document must be 300 KB or smaller. Scanned documents from smartphones are often much larger than this limit.
Fix: Use a free online PDF compressor to reduce your file size below 300 KB before uploading.
2. Photo or Signature File Too Large
Your passport photo and signature image must each be 50 KB or smaller. Camera images from smartphones are usually several MB, which will cause the upload to fail.
Fix: Use a free online photo resizer or image compressor to bring your photo and signature under 50 KB before uploading.
3. Wrong File Format for Documents
The portal accepts PDF only for all certificates and identity documents. Uploading a JPG, PNG, or Word file will result in an upload error.
Fix: Scan your documents and save them as PDF. If you only have image files, use a free online JPG-to-PDF converter.
4. Wrong File Format for Photo or Signature
The photograph and signature fields accept JPG or PNG only — not PDF, HEIC, or WEBP.
Fix: Convert your photo or signature to JPG or PNG format before uploading.
5. Invalid or Inactive Mobile Number
If the mobile number entered during registration is switched off or unreachable, you will not receive your OTP or Secret PIN and cannot complete the application.
Fix: Use an active mobile number with network coverage before starting registration.
How to Compress a PDF to Under 300 KB for Yuva Shakti
- Open a free online PDF compressor (such as ilovepdf.com or smallpdf.com).
- Upload your scanned document.
- Click Compress.
- Confirm the output file is under 300 KB.
- Download the compressed file.
- Upload it to the Yuva Shakti portal.
How to Resize Your Photo or Signature to Under 50 KB for Yuva Shakti
- Open a free online image resizer or photo compressor.
- Upload your passport photo or signature image.
- Set the target size to below 50 KB.
- Download the compressed image.
- Upload it to the Yuva Shakti application portal.
Frequently Asked Questions
Has the Yuva Shakti scheme application started?
No. The Yuva Shakti portal has not yet opened for registration. Check back here for the latest updates on the application start date.
What is the Yuva Shakti stipend amount?
Eligible applicants will receive a monthly stipend of ₹3,000 under the Yuva Shakti scheme.
What documents are required for Yuva Shakti?
You need your Madhyamik Admit Card, Mark Sheet or Certificate, Aadhaar Card, Voter Card, Bank Passbook first page, caste certificate (if applicable), a recent passport size photo, and your signature.
What is the Yuva Shakti photo upload size?
Your passport size photograph must be in JPG or PNG format and must not exceed 50 KB.
What is the Yuva Shakti document upload size?
All PDF documents must be 300 KB or smaller each.
Which format should I use for Yuva Shakti documents?
All certificates and identity documents must be in PDF only. Your photo and signature must be in JPG or PNG format.
Why is my Yuva Shakti document not uploading?
The most common reasons are file size exceeding the limit, wrong file format, or missing self-attestation. Compress your files, convert to the correct format, and try again.